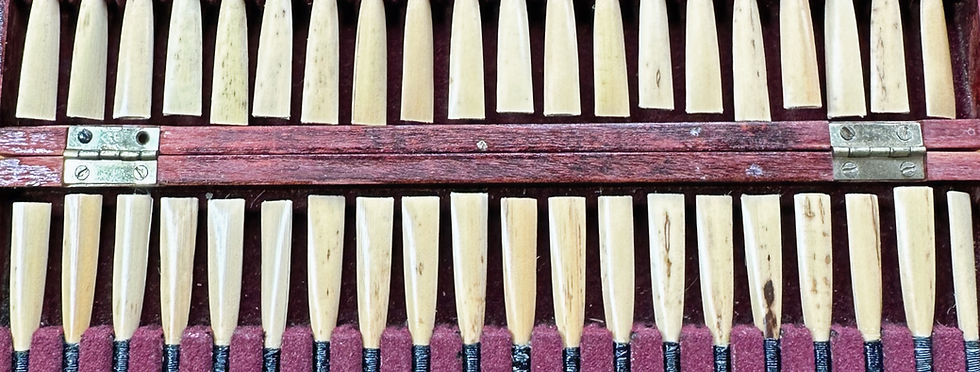
Reeds... Reeds..... Reeds
The Process
1) Start by measuring the length for the base of the scrape. You can use the caliper gauge to make a mark on the cane by applying a small amount of pressure.
2) Using your freshly sharpened reed-knife (ALWAYS sharpen your knives before each session of reed making,) mark a line across the cane almost straight just rising very slightly at the corners. Using a heavy knife scrape in long strokes from the base of the scrape to the tip. Be systematic, doing the same number of strokes in each region. Thin out the tip slightly and cut off either with a tip cutter or a scalpel blade.
3) Now insert your plaque and continue to thin slightly the body of the reed. DON'T do too much at this stage. Remember you can't put the cane back!
4) Define the tip by measuring with your caliper gouge and marking the upper point of the tip. Scrape in a straight line up to the tip. Using a pencil, draw the shape of the tip onto the cane to use as a guide. Follow the pencil guide by making clear indents in the cane with your reed-knife (I use a finer blade for the tip.) Thin the tip.
5) Thin the sides down. You should be able to see clearly the regions of the reed (tip, spine, thinner sides) when you look at it through a light.
6) You can try the reed at this point, and adjust as necessary. Don't forget to measure using a micrometer at every stage.
These reeds will not need a wire. It is a myth that wiring will make your reed more responsive, at least with this system. All you will achieve is strangling the reed. If you have used the correct diameter cane, not used cane that is too soft, shaped it carefully and scraped it to the right measurements, you simply will not need a wire.
The way to the perfect reed
We're all looking for the secret to the perfect reed..... but I guess until someone finds the solution (if they can put man on Mars surely someone can figure out how to make the perfect oboe reed...) we can but share ideas. My reeds are based on those of my former teacher, Bernd Holz (WDR Sinfonie Orchester, Köln.) They are light, flexible, but in no way have a thin tone (I am a fan of the dark side.....) I found changing to this style of reed solved so many problems, pitch, intonation etc. I play on a Ludwig Frank Oboe but used the same set-up on a Marigaux Oboe and before that a Howarth. All I have had to change is the staple length.
Selecting the Cane
It's a bit like "popstars"..... you know most of the cane (applicants) will be completely hopeless, but you have to go through it all systematically (first selection.)
1) Measure the cane carefully. I use a 10mm bed - and a Michel or a Reeds n Stuff gouger. The cane should be slightly narrower than 10mm when dry as it will swell when soaked.
Select cane that is golden, straight and has a halo of hard cane around the edge. Don't attaempt to use cane that is too pale (soft), not straight or uneven in colour. You will simply waste time trying to make a reed that ultimately will probably not work.
Another don't - Don't use a cane splitter. It is rare to get three good pieces of cane from one stem. Rotate the cane in the gauge until you get the perfect fit and only use the straight pieces of the right diameter.
Pre-Gouging
This is like the "first recall" on Popstars. You can discard quite a lot of cane after pregouging, when it is easier to see if it is too soft.
I use a " Reeds n stuff " pregouger. It is quick and safe - absolutely impossible to cut your fingers. It also gouges quite thin, so that you'll have less cane to take off with the gouging machine. This will mean your blade will stay sharp for much longer!
When you have pregouged the cane, check it's flexibility. If it is bendy, with no strength, discard it - it will be too soft. Also discard any cane that doesn't go smoothly through the pre-gouger, that too is an indication of soft cane. If the cane inside is very pale, it is also probably too soft.
Gouging
1) Soak cane for 5 minutes and then leave damp in a plastic bag. Why gouge wet? The theory is that if you gouge dry, the cane will be thicker when wet, and you will therefore have to scrape more of the good hard cane from above. also, it is less damaging to your blade. More about that later. Just remember this is only what I do. Other people gouge dry.
2) Do not press hard down on the blade. The gouging machine should be carefully set up to gouge to the right thickness with little pressure. You don't want to flatten the fibres, they will just seem thicker then when dried out and re-soaked. Are you sitting down? This is the surprising bit. I gouge to .53-.54. Yes .53-.54. That's not a typo. What is the theory behind this seemingly thin gouge. It's all to do with good cane / bad cane.
Look at a piece of tube cane under a spot light. You can see, on a good piece, a "halo-like" glow of orange around the edge. This is the hard bark. It indicates a good hard piece of cane.
When you gouge you gouge from underneath, just the soft cane (bad cane), leaving the hard cane (good cane) for the reed. When you scrape, you take away from the good cane. Therefore, if you gouge MORE to start with from underneath (soft cane) you don't have to take so much good cane away from the top therefore maximizing the use of the best cane.
Sort of logical isn't it?
3) 2nd Recall time.... Look carefully at the shavings you get from gouging. They should be about .05-.06 thick and the width of the cane. If the cane comes off in little pathetic pieces, the cane is certainly too soft. Again, don't waste time on poor cane. Better to practice Silvestrini studies huh?
4) If the shavings are good and the cane measures .54-.55 (this is the wet thickness, it will be a little thinner dry), it's looking promising... Do the twist test again. It should have give but spring back to it's straight form. Yes? OK, then next............ shaping (the Popstars masterclass?)
Shaping the cane
I used to use a wonderful machine by Adolf Hörtnagl (Austrian chappy), using a number 25 for oboe, 20 for D'Amore and a number 60 for Cor Anglais. I now use a reeds n stuff machine, which is similar and has also a huge range of shapes. The only downside with this machine is that it is a little trickier to swap to a Cor Anglais template as you have to take out the plastic guards on the template fitting.
Not much more to say. The machine does it all for you. Perfect shaped cane every time!
(Sounds like an advert?)
Tying-On
When I first met Bernd, he said to me he had never seen anyone tie-on a reed quite as badly as me. It's not a comment I am proud of, but it was true. Tying-on is really important. Why go to all that effort to select good cane (all those recalls) only to dress it in Granny's frock and expect it to look good on stage? (not sure the analogy is really still working, but I'll stick with it for the time being....)
EQUIPMENT:
Cigarette lighter, Thread - strong but not too thick, with a slight stretch to it, D-11 Mandrel (OR Mandrel to fit your staple if you are using a different staple), Klöpfer copy D-11 staples. I use staples by Möckel, but these are notoriously hard to get hold of. The Guercio ones are readily available but not as consistent. Do check for a perfect fit on the mandrel and discard a staple if it doesn't fit well. Staple length will vary depending on your instrument and embouchure. I use 46mm staples to play at 440, 45mm for 443. Most people will use 46mm or 47mm. In addition, add wire, pliers, easel, scraping knife and vernier caliper (digital or analogue) to your tool list.
1) Soak the cane only for as long as it needs to sink. You can time it and make a note as the length of time indicates the hardness of the cane, the hardest cane sinking first. If it is still happily swimming after 15 minutes or so, throw it out! Don't waste your time (time that could be used on those Silvestrini studies) tying-on a piece of cane that is obviously too soft. Experiment and make a note of how long the cane takes to soak. This way when you make a great reed, you'll know the ultimate "sink-time" to aim for. This also saves you the cost of an expensive hardness tester, which will do the same job.
2) Twist a piece of wire twice around your mandrel and make a loop by twisting the ends tight. NB/ Make sure you use a mandrel designed for use with the staples you use, ie. D-11. There is no point in trying to get one shape of mandrel to fit with a different shape of staple!
3) Using the easel, scrape the ends of the cane up to about 5mm and then mark a cross just above the scraped area to stop the cane from splitting and to allow it to make a really good oval.
4) Place the wire loop about 6mm up from the base of the folded cane.
5) Take your cigarette lighter and heat up the mandrel for about 90 secs or until it feels hot to the touch. DON'T hold it too close to the metal or you will leave black marks on the mandrel.
6) Cool the tip only of the mandrel briefly in water and then take the cane and place on the mandrel until about half way up. Pull the wire loop tight with pliers. The cane should almost close at the sides. Make sure both sides close evenly.
7) Push the wire loop up the cane slightly and remove from Mandrel. Put your staple on the mandrel. Check that it fits exactly. Discard staples that are too narrow or too wide. Put cane on Staple and measure the total length to
75.5mm (for 46mm staples.) Check the wire loop is at 45mm (or 46mm for 47mm staples). This will stop you over-tying the reed and strangling it.
8) Begin to bind up to the wire loop and then down to the base. Keep the thread level and nicely taut. NEVER bind above the staple, preferably a little under it, even up to 2 or 3mm under.
9) Make sure your knot at the base is really secure. I used to use nail varnish for extra security to the binding but now use ceramic glaze on the binding and to about 3mm up the sides of the cane. This helps to hold an airtight seal and it is waterproof.
Scraping / Profiling
Want to explore this reed making method further? Come for a consultation at my studio in Lower Heyford
Profiling
I use a Reeds n Stuff profiler with a No. 20 template. I profile to around 50% finished and have the machine set up 1mm longer than the finished length in order to cut off to final length when the reed is finished. Reeds n Stuff machines are available through most suppliers, but if you fancy a nice weekend break, the area around where Udo Heng has his workshop - the Erzgebirge area (largest town Annaberg-Buchholz) is delightful. Udo is in Cranzach.
Cor Anglais reeds
The tying-on process is of course the same as for the oboe reeds. I use the EH shaper number 61 from Reeds n Stuff which is a copy of the original Hörtnagel template. The cane is also gouged quite thin, between .62-.63mm (when dry). Here are the measurements:
There is the extra element of the crook that means giving exact measurements for a Cor Angais reed is difficult, as so much more is dependant on instrument type, crook and therefore which staples fit. I have a Loree Royale Cor Anglais. I used to use a Guercio crook which I loved, but when I moved back to the UK it was too high in pitch so switched to a Loree gold crook. I have recently invested in a Richard Craig crook, which I adore, but has meant moving from my Guercio B staples. Still experimenting to find the perfect set up!
The important thing to remember here is that all the measurements are made from the BOTTOM of the staple up.
These measurements are based on a 46mm staple.
Overall length when finished: 70 (71 for 47mm staples, 69 for 45mm staples)
Base of scrape: 60.5 (61.5, 59.5)
Start of Tip: 68.5 (69.5, 67.5)
It's really hard to describe this scrape. The main points are the spine which gives this thin reed strength, and the very defined base and tip. The tip is almost triangular, and longer than you might be used to.
Some ROUGH micrometer measurements of a finished reed for a guide:
Tip:.5-.6mm
Start of hump behind tip in centre: .30-.33mm
Edge of hump at sides: .25mm
Half way down in centre: .40mm
Half way down at sides: .25-.28mm
Base of scrape at centre: .40mm
Base of scrape at sides: .29-.32mm